How to Look Slimmer in Maternity Photos (Lighting and Posing That Actually Work)

It’s one of the most common concerns going into a maternity photoshoot: how will I look on camera?
Pregnancy changes body proportions, posture, and how clothing fits. On top of that, cameras interpret light and shape differently than the human eye. While your eyes see in 3D, a camera sensor flattens the world into 2D. Without the right techniques, that "flattening" effect can add visual weight.
Looking slimmer in maternity photos isn’t about hiding your body—it’s about creating depth. When you understand how light and angles interact, you can sculpt the body to look balanced, defined, and elegant.
1. The Physics of "Flat" Lighting
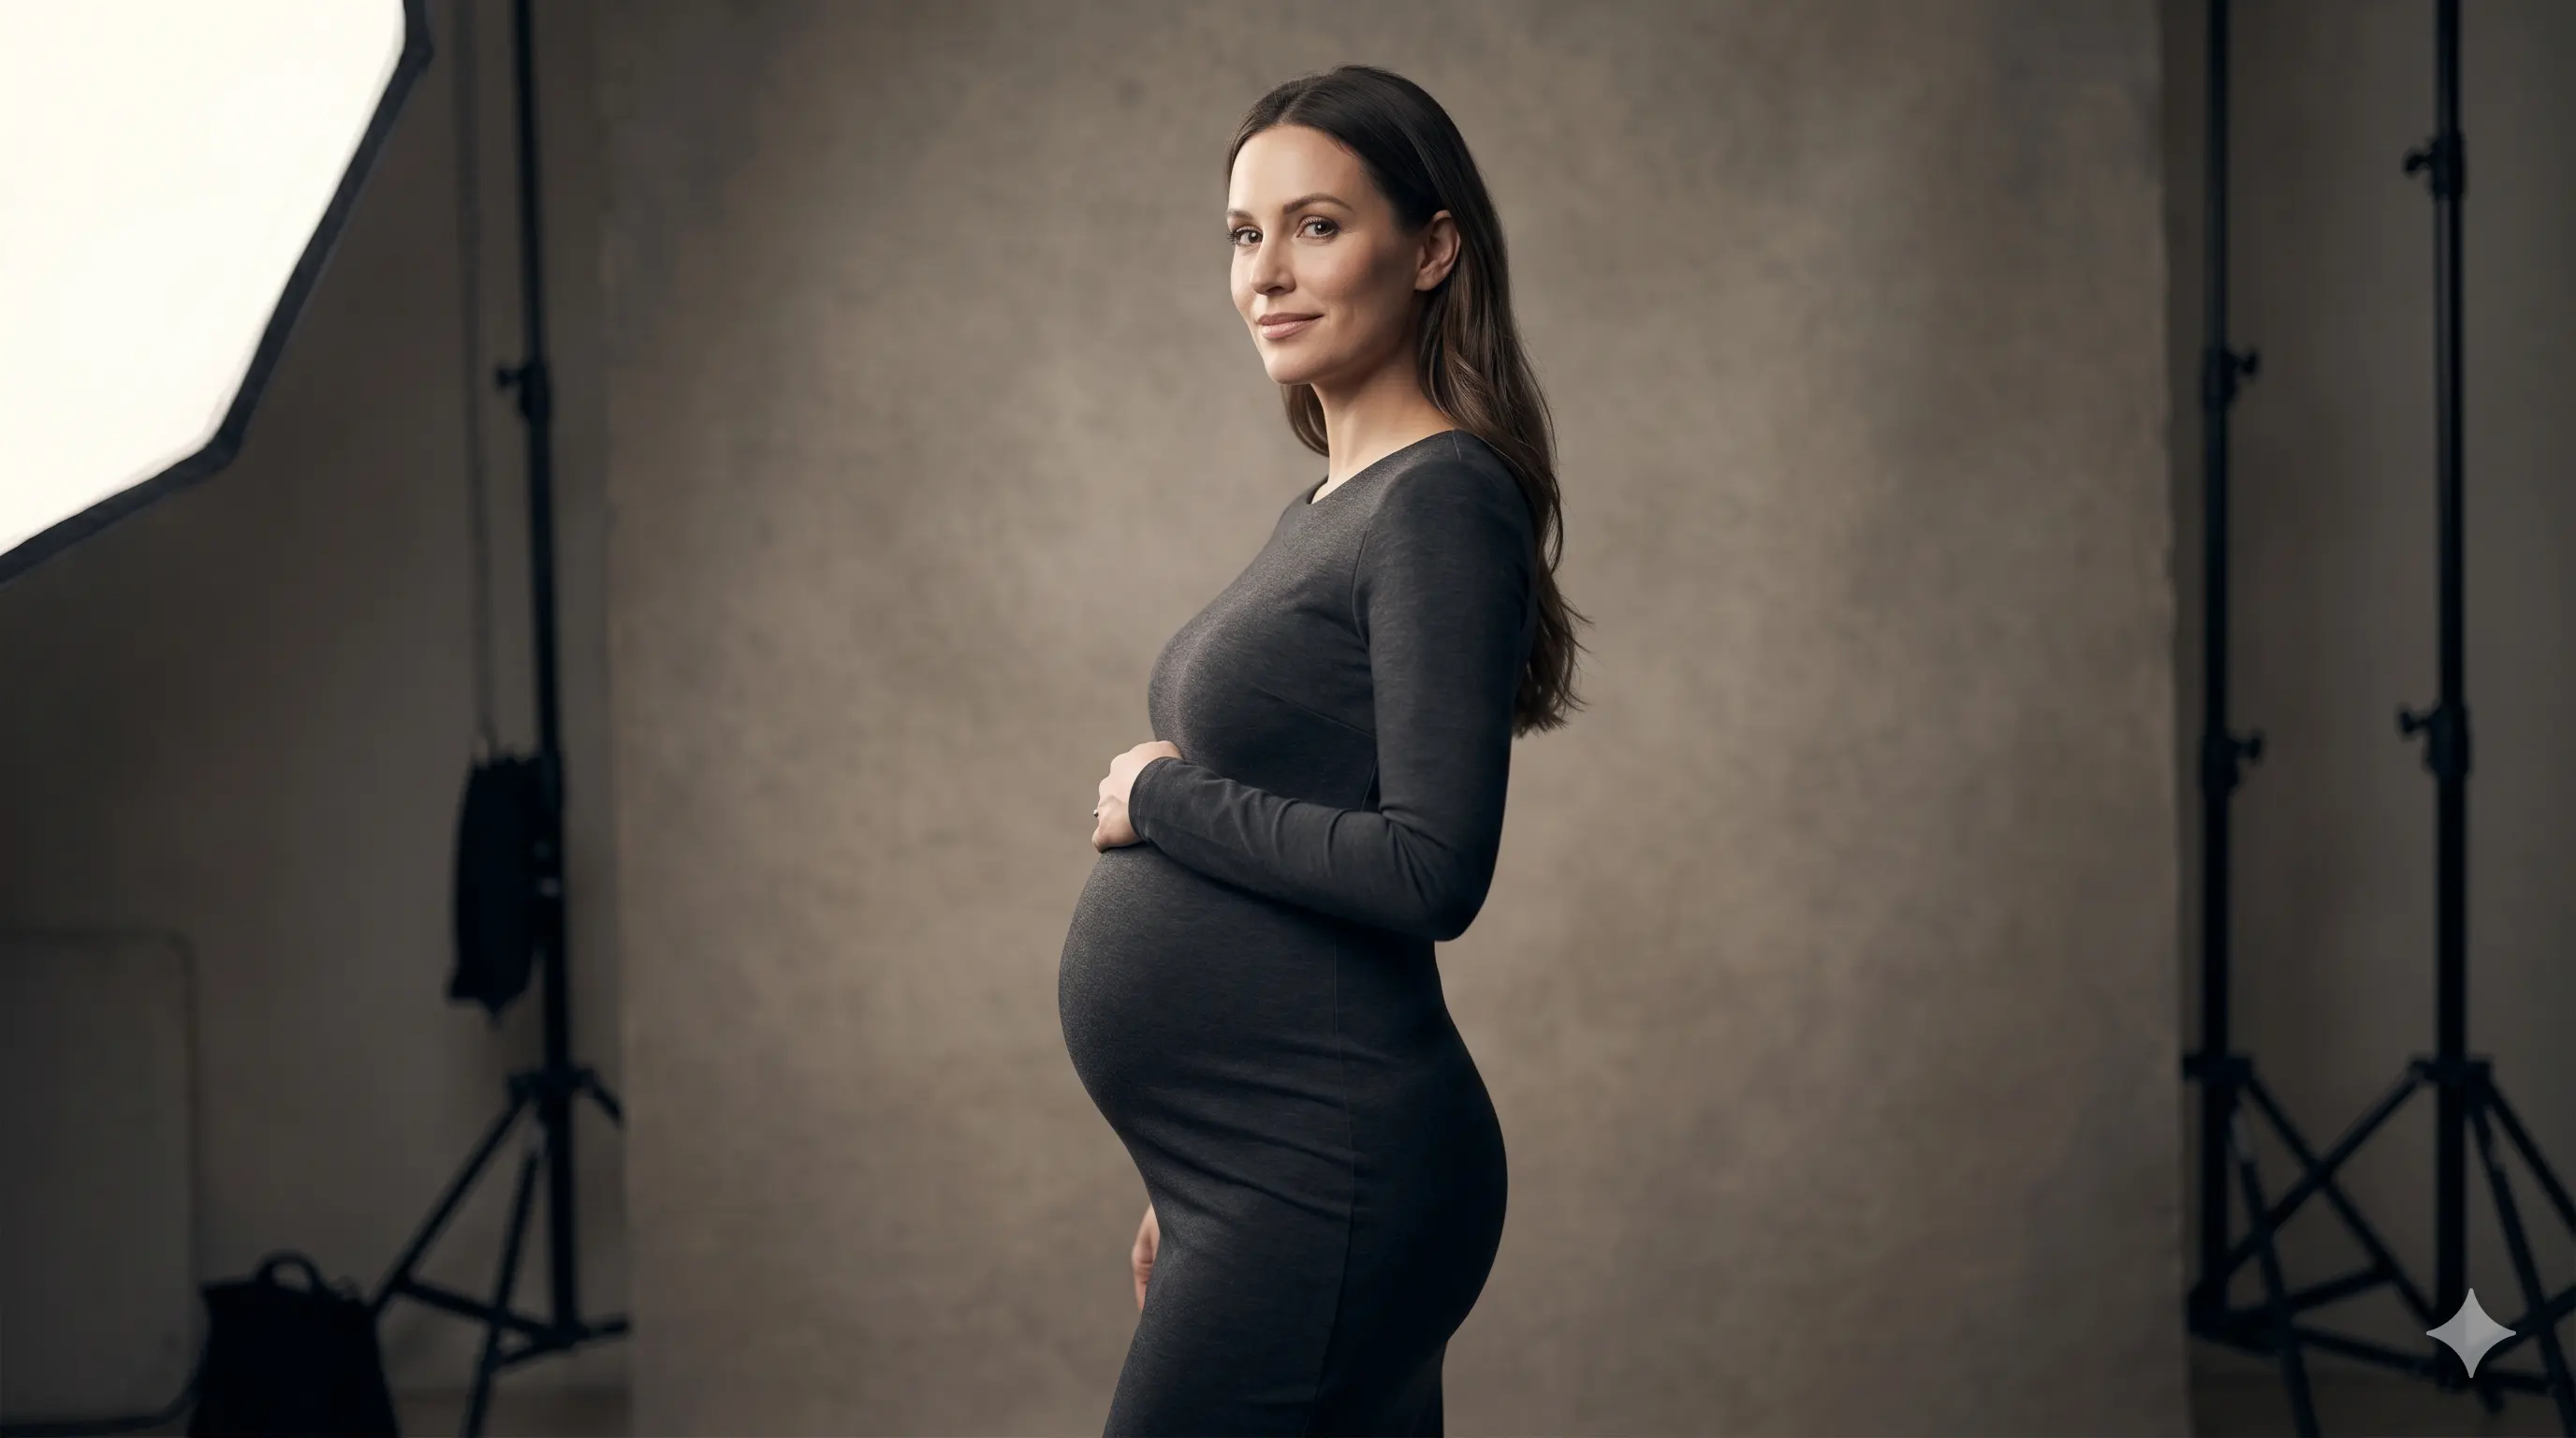
In everyday life, our eyes constantly move, helping us perceive depth. A camera, however, captures a single slice of time. If light hits you directly from the front (like a camera flash or a window directly in front of you), it fills in all the natural shadows.
The Result: Without shadows to define where your body ends and the background begins, you appear wider. This is known as "flat lighting." To look slimmer, we must move away from flat light and embrace Directional Light.
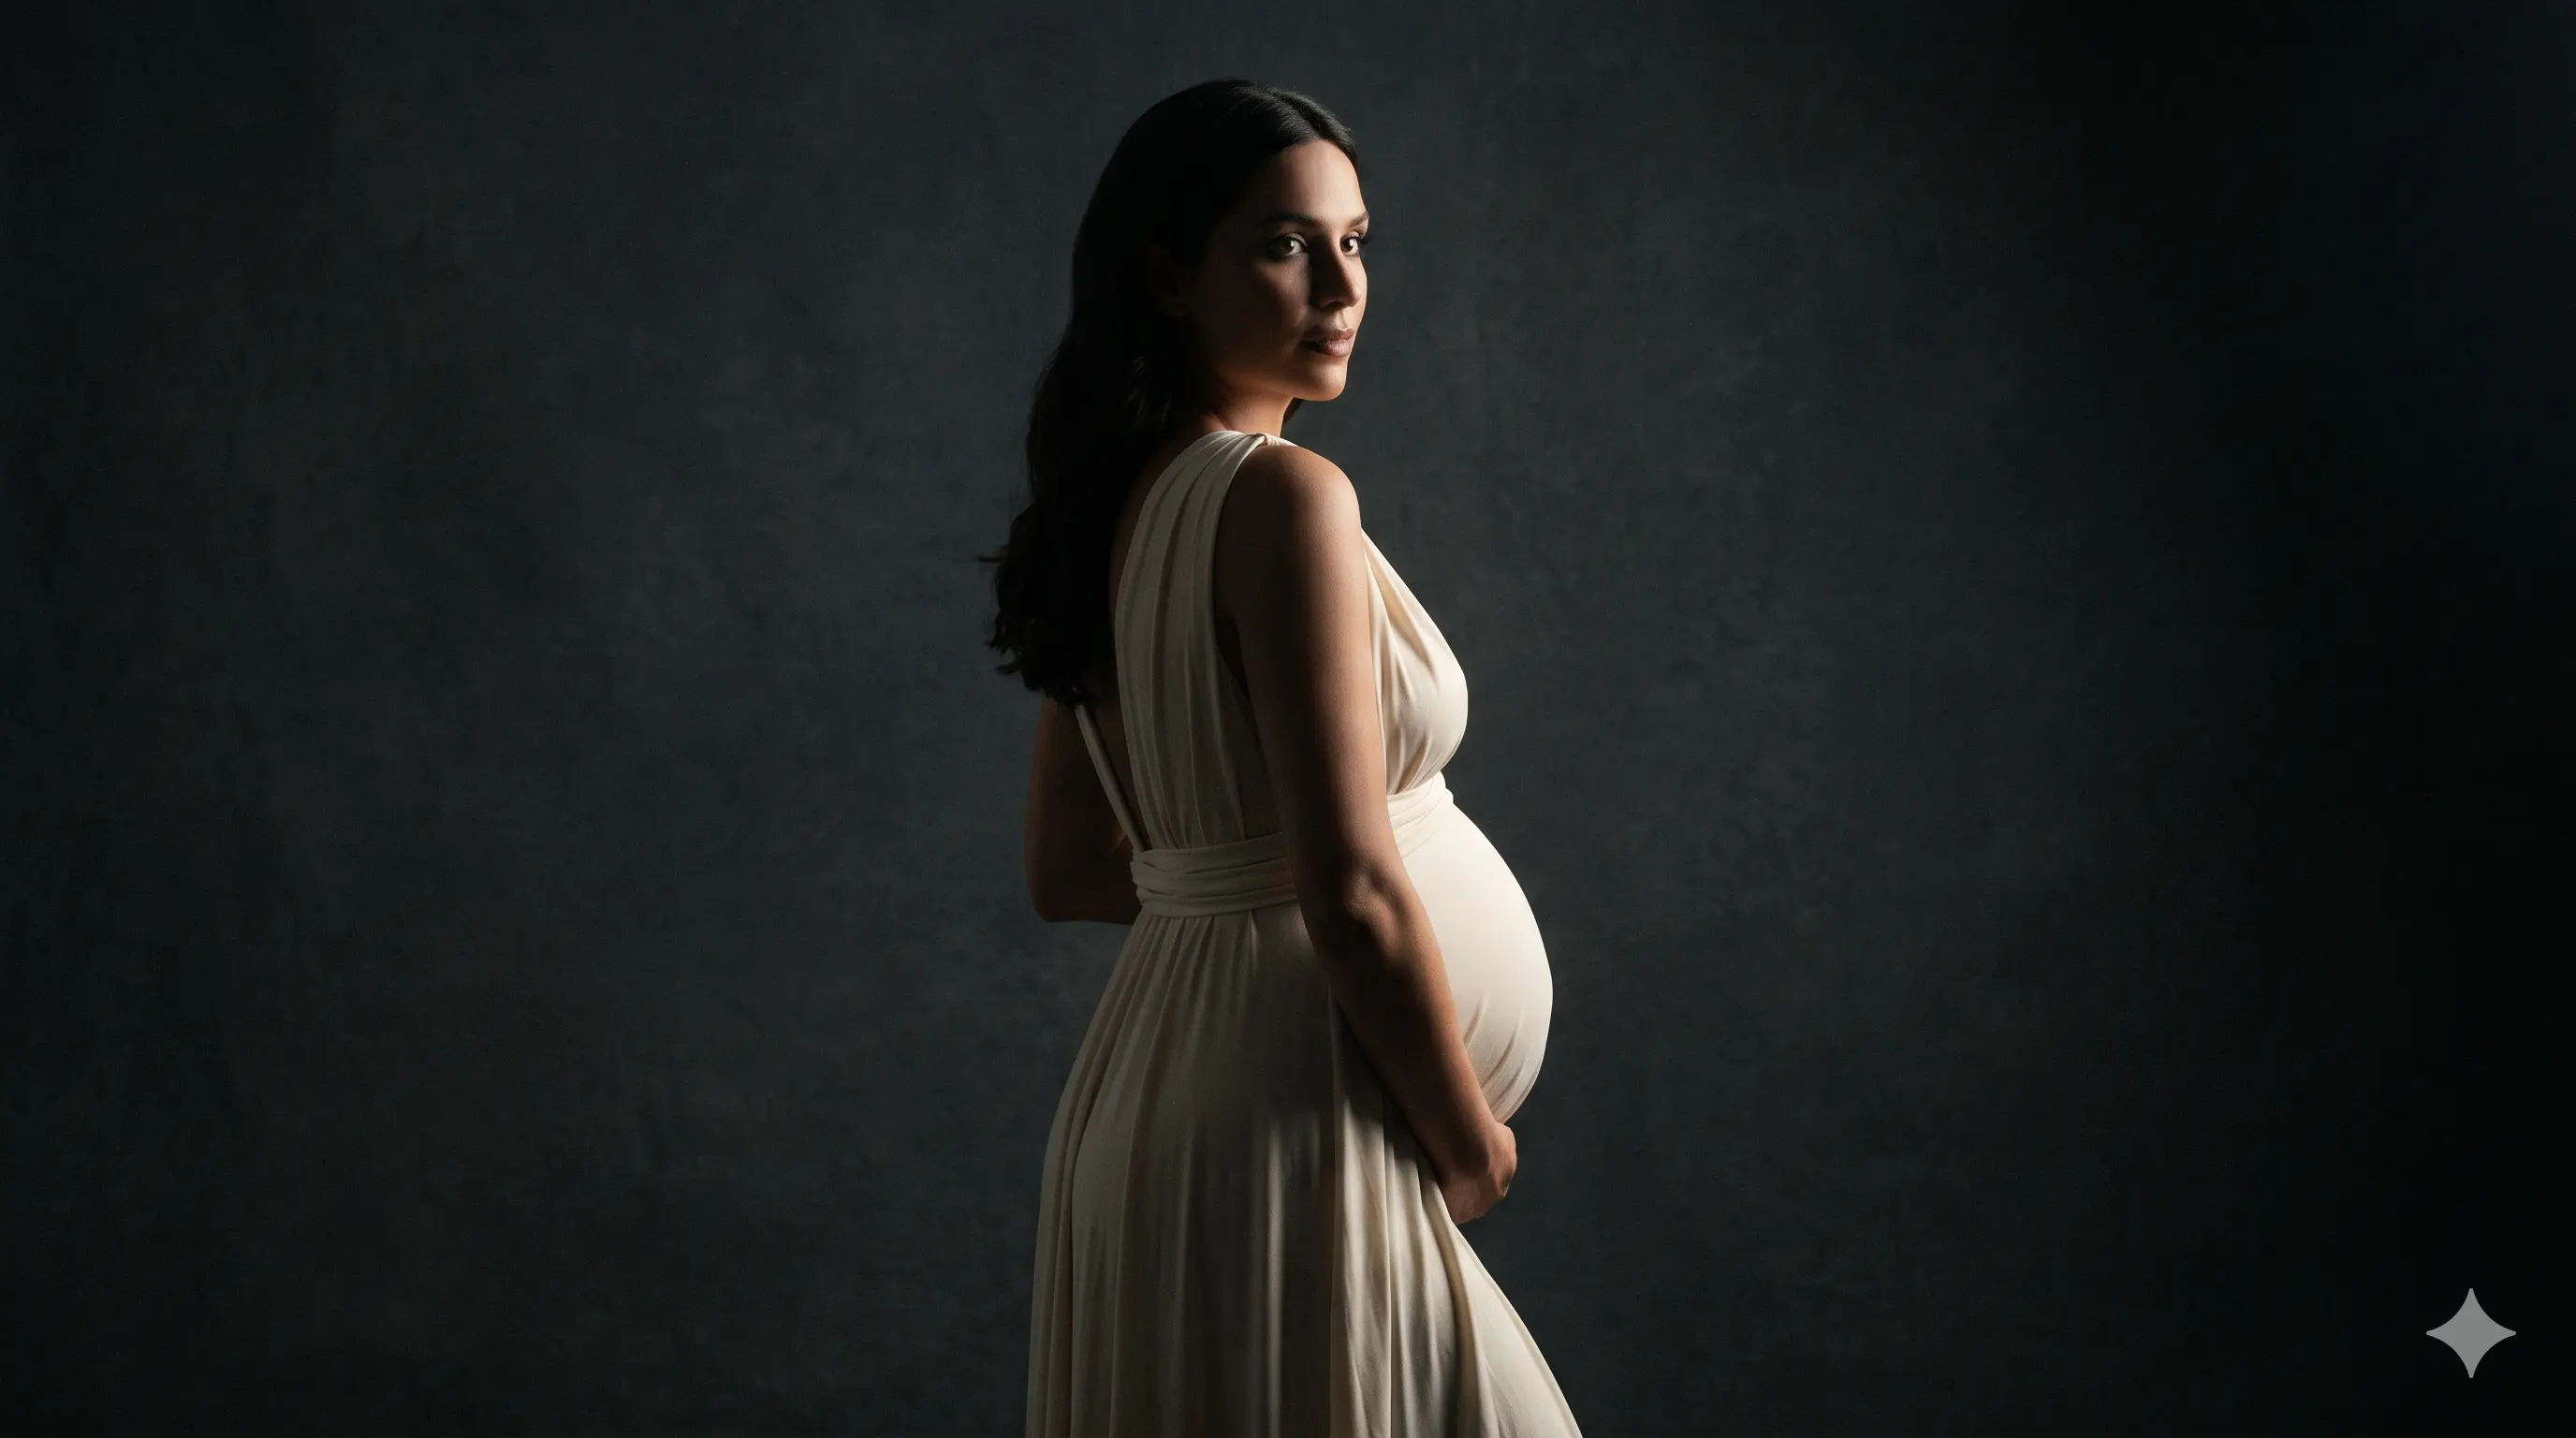
2. Use "Short Lighting" to Sculpt the Frame
In professional portraiture, the most slimming technique is Short Lighting. This occurs when the part of your body facing the camera is in shadow, while the side turned away is lit.
- How it works: By keeping the broadest part of your body in shadow, the eye is drawn only to the highlighted "sliver" of your silhouette.
- The Benefit: It creates an immediate contouring effect, narrowing the torso and defining the jawline and bump simultaneously.
3. The "Rule of Triangles" in Posing
When limbs are pressed flat against the body, they merge into a single, wider shape. To create a slimmer profile, photographers use Triangulation.
- Create Space: Bend an elbow or a knee to create a "triangle" of negative space between your arm and your waist.
- Define the Waist: By daylighting the space between your arm and your torso, you prove to the camera where your waist begins, preventing the "blocky" look that maternity clothes can sometimes cause.
4. Weight Distribution and the "Z-Axis"
A camera sees width on the X-axis (left to right) and height on the Y-axis (up and down). To look slimmer, you must use the Z-Axis (depth).
- Shift Your Weight: Always put your weight on your back leg (the one furthest from the camera). This naturally tilts your hips away from the lens, narrowing the lower body.
- The "Lean": Slightly leaning your upper body toward the camera while keeping your hips back creates a perspective shift that elongates the neck and slims the midsection.
5. Fabric Interaction: Reflectance vs. Absorption
Not all fabrics are created equal in a studio environment. The way a fabric handles light determines how much "shape" is visible. Here is how common maternity choices interact with the camera:
- Matte Cotton:
- Effect: Flattens.
- Why: Absorbs light evenly, hiding the contours of the bump.
- Satin / Silk:
- Effect: Slims & Defines.
- Why: Highlights the "peak" of the curve and leaves the edges in shadow.
- Heavy Knits:
- Effect: Adds Bulk.
- Why: Adds physical inches to your silhouette that the camera exaggerates.
- Sheer Layers:
- Effect: Contours.
- Why: Allows the light to see the actual silhouette through the fabric.
Self-check: If you're worried about specific outfits, check out this guide on What Not to Wear for Maternity Photos.
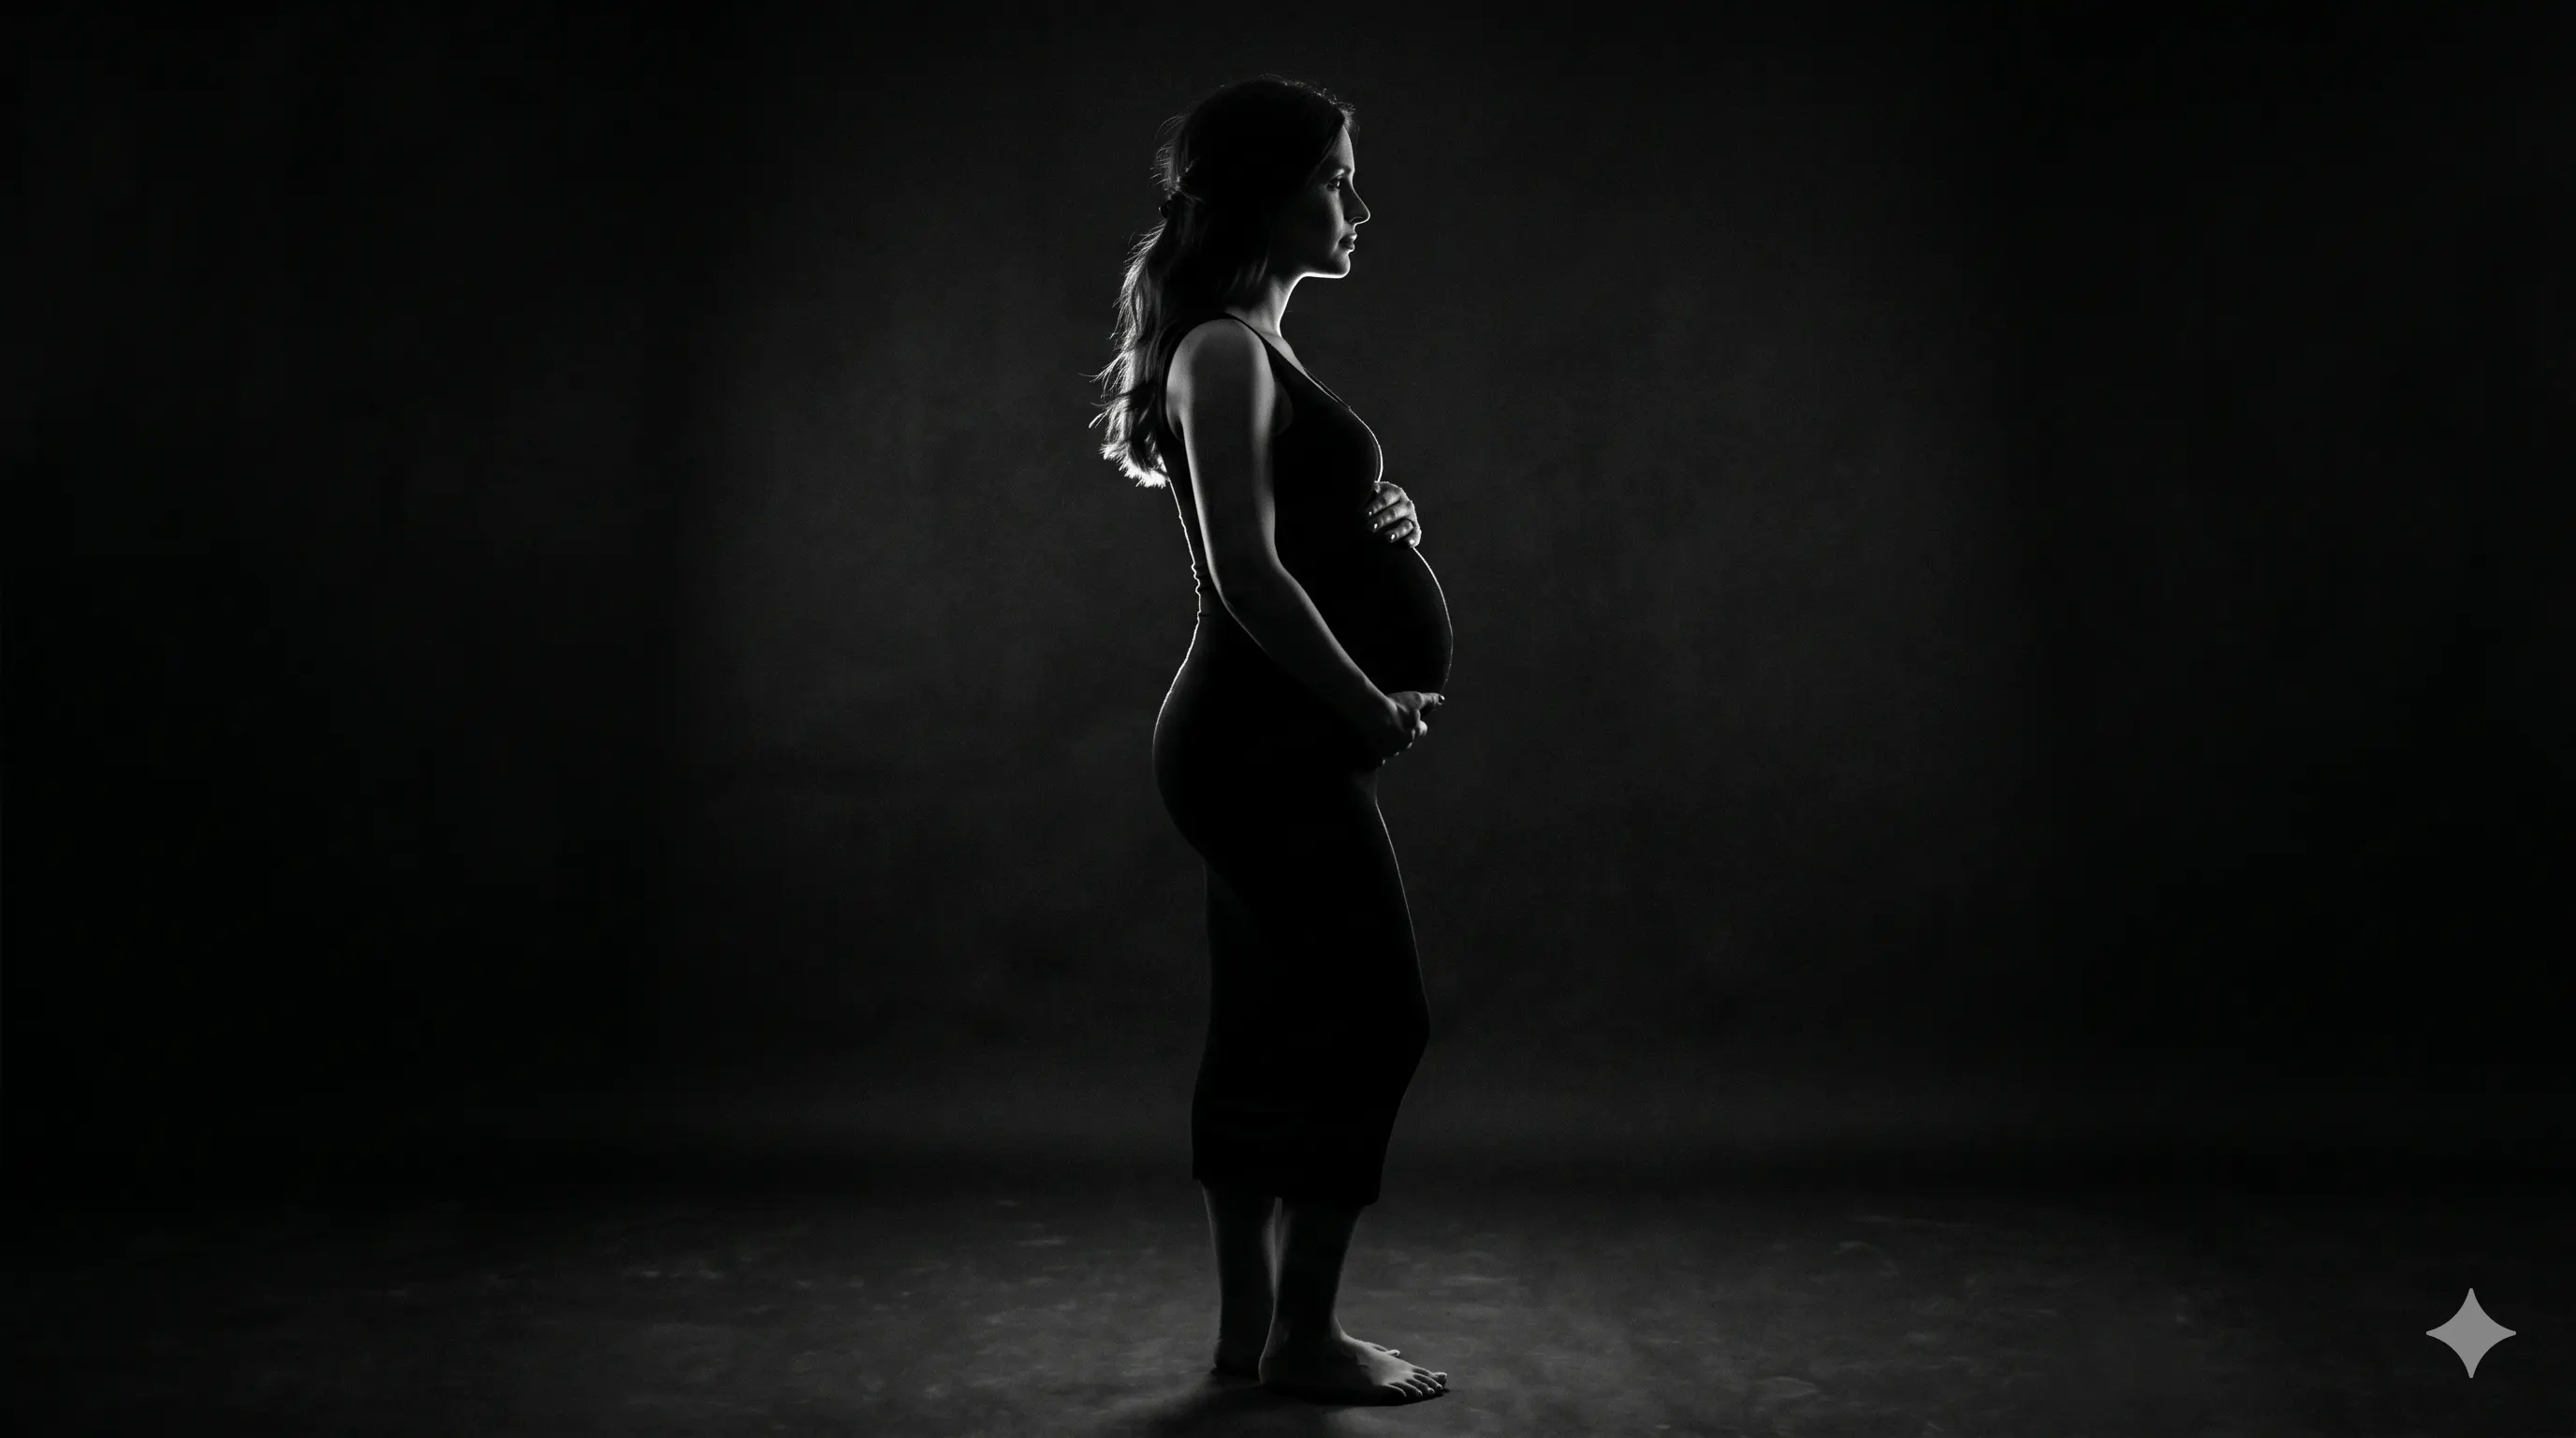
6. Shadow is Your Best Friend
A common misconception is that more light makes a better photo. In reality, shadow is what creates the illusion of a third dimension.
Without shadow, there is no shape. By allowing "Rim Lighting" (light that hits only the edges of your body) to do the work, we can create a "halo" effect that separates you from the background, making you look lean and statuesque regardless of your stage of pregnancy.
7. Movement vs. Stagnation
When you stand perfectly still, your muscles tense, which can lead to a "compressed" look. Small, fluid movements—like walking toward the camera or slowly rotating your shoulders—keep the body elongated. Movement ensures the fabric of your dress flows away from the body rather than clinging to areas you’d rather not emphasize.
Final Thoughts
Looking slimmer in maternity photos isn't about changing your body; it's about mastering the geometry of the frame. By prioritizing directional light, creating negative space with your limbs, and choosing fabrics that catch highlights, you ensure the camera captures the most polished, three-dimensional version of you.
Ready to see these techniques in action? Prepare for your session with our Professional Studio Blueprint.


